To screenshot on Lenovo Yoga, press the Windows and PrtScn keys simultaneously. Lenovo Yoga offers a convenient and straightforward method to capture screenshots.
Whether you need to save an image, share important information, or troubleshoot, knowing how to take a screenshot is essential. Fortunately, obtaining a screenshot on a Lenovo Yoga laptop is quite simple. In this guide, we will walk you through the necessary steps to capture a screenshot on your Lenovo Yoga device.
By the end, you’ll be able to effortlessly take screenshots and utilize this useful feature to enhance your productivity and communication. So, let’s get started and learn how to capture screenshots on a Lenovo Yoga laptop.

Credit: www.wikihow.com
Using The Prtsc Key
When it comes to taking screenshots on your Lenovo Yoga, using the PrtSc key is a quick and efficient method. Whether you want to capture the entire screen or a specific window, mastering the PrtSc key functionality can be a handy skill. Below, we’ll explore the process of using the PrtSc key on your Lenovo Yoga to capture screenshots effortlessly.
Locating The Prtsc Key
Locating the PrtSc key on your Lenovo Yoga is the first step to harnessing its screenshot capabilities. Typically, the PrtSc key can be found on the top row of your keyboard, often accompanied by other function keys. On some Lenovo Yoga models, the PrtSc key might be labeled as “Print Screen” or “PrtScn” and could require the use of the Function (Fn) key in combination to access its full functionality.
Capturing The Full Screen
Using the PrtSc key to capture the full screen on your Lenovo Yoga is a straightforward process. Simply press the PrtSc key, and the screenshot of your entire display will be saved to your clipboard. To save the screenshot as an image file, open an image editing software or a word processing program, then paste the screenshot using the Ctrl + V combination. After pasting, you can save the screenshot and use it as needed.
Credit: m.youtube.com
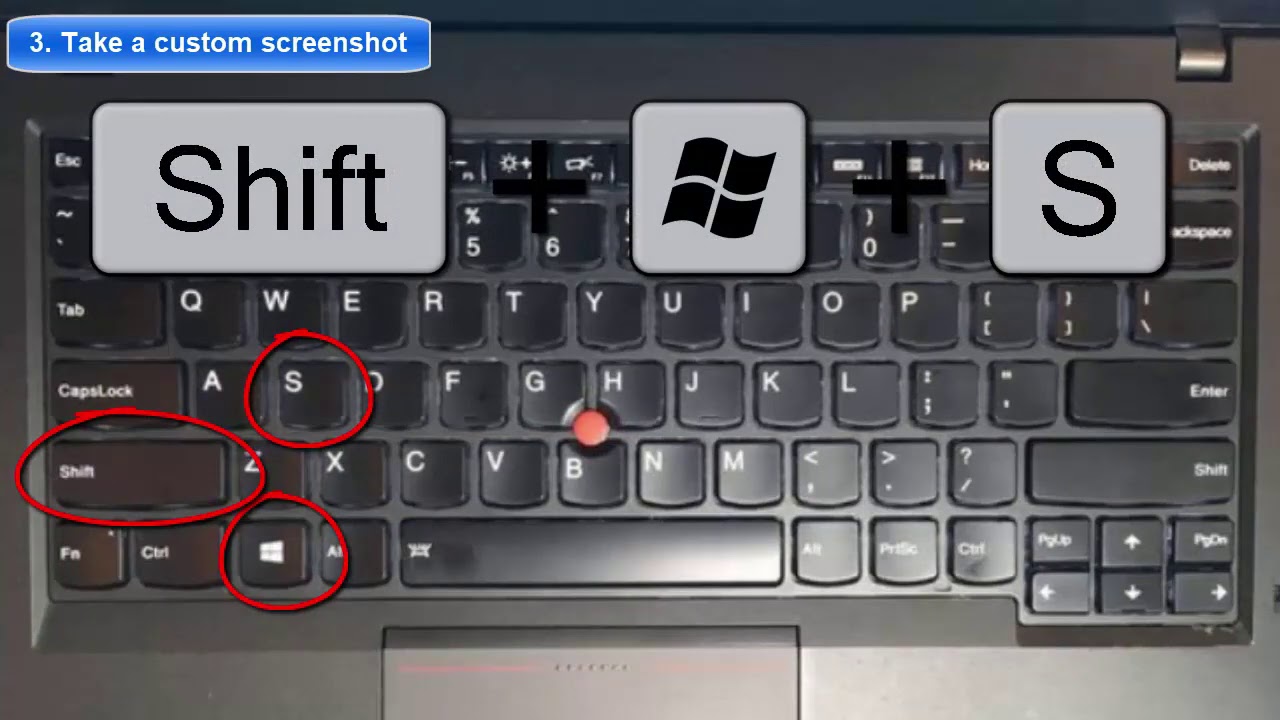
Using Snipping Tool
When it comes to taking a screenshot on your Lenovo Yoga, using the Snipping Tool can be a convenient and effective method. This built-in Windows application allows you to capture specific areas of your screen with various options for customization.
Opening Snipping Tool
To access the Snipping Tool, follow these simple steps:
- Click on the Start button.
- Type “snipping tool” in the search bar and select the application from the results.
- The Snipping Tool window will open, ready for you to begin capturing your screen.
Capturing Specific Areas
Once you have the Snipping Tool open, here’s how you can capture specific areas:
- Click on the New button to initiate the capture process.
- Drag the cursor to select the desired area you want to screenshot.
- Release the cursor to capture the selected area.
- You can then annotate, save, or share the captured screenshot as needed.
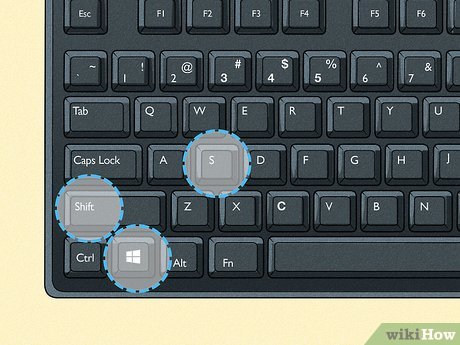
Using Windows + Volume Down Shortcut
Capture your screen quickly with the Windows + Volume Down shortcut on your Lenovo Yoga device. Learn how this easy method allows you to take screenshots effortlessly.
How The Shortcut Works
To take a screenshot using the Windows + Volume Down shortcut on your Lenovo Yoga:
- Press and hold the Windows key on your keyboard.
- Simultaneously, press the Volume Down button on your device.
- The screen will dim momentarily, indicating that the screenshot has been captured.
Saving The Screenshot
Once you have taken the screenshot:
- Locate the image in your device’s Photos app or Gallery.
- Tap on the screenshot to view it and choose to Save or Share as needed.
:max_bytes(150000):strip_icc()/lenovoscreenshotbutton-aec8243012124d708e30e69d00e20992.jpg)

Credit: www.lifewire.com
Utilizing Third-party Apps
Utilizing third-party apps is a great way to enhance the screenshotting capabilities of your Lenovo Yoga device. These apps offer additional features and customization options that can enhance your screenshot experience. In this section, we will explore some recommended apps for screenshotting on Lenovo Yoga and discuss the features they offer.
Recommended Apps For Screenshotting
When it comes to choosing the right app for screenshotting on your Lenovo Yoga, there are a few options that stand out. These apps not only provide a seamless screenshotting experience but also offer additional features to take your screenshots to the next level.
- Screenshot Easy: This app provides a user-friendly interface and a wide range of screenshot options. With Screenshot Easy, you can capture screenshots in various formats such as PNG, JPG, or GIF. Additionally, it allows you to annotate your screenshots with text, crop them, or even share them directly to your favorite social media platforms.
- Super Screenshot: Super Screenshot is another great app that offers a plethora of screenshotting features. Along with capturing screenshots, it provides options to capture scrolling screenshots, screen recordings, and even screen annotations. With its intuitive interface and smooth functionality, Super Screenshot is definitely worth a try.
- Apowersoft Screenshot: If you are looking for a feature-rich app, Apowersoft Screenshot should be on your list. This app not only allows you to capture screenshots but also offers cloud storage for easy access to your screenshots across multiple devices. Moreover, it provides editing tools like text, shapes, and stickers to add a personalized touch to your screenshots.
Features Of Third-party Apps
Third-party apps for screenshotting on Lenovo Yoga devices come with a range of features that enhance your screenshotting experience. Some of the notable features include:
- Advanced screenshotting options: These apps provide various screenshotting options such as capturing a specific portion of the screen, capturing scrolling screenshots, or even capturing screenshots with a timer.
- Editing and annotation tools: Along with capturing screenshots, these apps offer editing and annotation tools to customize your screenshots. You can add text, draw shapes, highlight specific areas, or even blur sensitive information.
- Cloud storage: Many third-party apps offer cloud storage options, allowing you to easily access your screenshots from any device.
- Sharing and social media integration: These apps often provide seamless sharing options, allowing you to share your screenshots directly to social media platforms or send them to your contacts via messaging apps.
By utilizing these third-party apps, you can maximize the screenshotting capabilities of your Lenovo Yoga device and make the most out of your screen capturing needs.
Frequently Asked Questions For How To Screenshot On Lenovo Yoga
How Do You Take Screenshots On A Lenovo?
To take a screenshot on a Lenovo, simply press the Windows logo key and the PrtScn key together. The screenshot will be saved in the Screenshots folder in the Pictures directory.
Where Do Screenshots Go On Lenovo Yoga?
Screenshots on Lenovo Yoga are saved in the “Screenshots” folder in the “Pictures” directory.
How Do You Take A Screenshot On A Lenovo Yoga Tablet?
To take a screenshot on a Lenovo Yoga tablet, press the power button and volume down button simultaneously. The screen will flash, indicating the screenshot is taken. You can find the screenshot in the Photos app or Gallery under the Screenshots folder.
How Do You Screenshot On A Lenovo Phone?
To screenshot on a Lenovo phone, press the power and volume down buttons simultaneously.
Conclusion
To sum up, taking a screenshot on your Lenovo Yoga is a simple yet powerful feature. Make sure to follow the steps provided to capture your screen effortlessly. Share your screen captures with ease and enhance your user experience. Explore the possibilities of screenshotting on your Lenovo Yoga today!