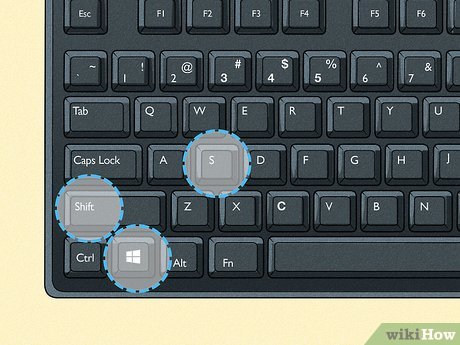
To screenshot on a Razer laptop, press the Windows key + PrtScn key simultaneously. The screenshot will be saved to the Screenshots folder in the Pictures directory.
Capturing screenshots on a Razer laptop is a handy feature that allows you to capture and save an image of your screen quickly. Whether you want to capture an important document, save an interesting webpage, or share something on social media, knowing how to take a screenshot can be incredibly useful.
We will guide you through the process of taking a screenshot on a Razer laptop, providing you with the necessary steps to capture and save your screen as an image. By the end of this article, you will be well-equipped to master the art of screenshotting on your Razer laptop.


Credit: www.linkedin.com
Built-in Tools
Using The Snipping Tool
The Snipping Tool is a handy feature on Razer laptops that allows you to capture specific areas on your screen. To access the Snipping Tool, simply type Snipping Tool in the Windows search bar and select the app from the search results. Once opened, you can choose the type of snip you want to take, such as free-form, rectangular, window, or fullscreen. After selecting your snip, you can then save the screenshot in your desired location.
Using The Print Screen Key
If you prefer a quick and easy way to capture your entire screen, you can use the Print Screen key on your Razer laptop. Simply press the Print Screen key on your keyboard, then open an image editing software such as Paint and paste the screenshot onto the canvas. You can then save the image in your preferred format.
Razer Synapse Software
Razer Synapse software is an essential tool for customizing and optimizing your Razer laptop’s performance. It offers a range of features, including the ability to customize screenshot settings, making it easy to capture what’s on your screen with just a few clicks. In this article, we’ll guide you through the process of utilizing Razer Synapse to take screenshots and customize your settings for the best user experience.
Installing Razer Synapse
To begin taking screenshots on your Razer laptop, start by installing the Razer Synapse software. This can be done by visiting the official Razer website and downloading the Synapse software specifically tailored for your Razer laptop model.
Customizing Screenshot Settings
Once you have Razer Synapse installed, customizing your screenshot settings is a straightforward process. Open the Synapse software and navigate to the settings menu. From there, select the “Screenshot” tab, where you can adjust various options, including the file format, saving location, and shortcut keys for capturing screenshots.
Third-party Software Options
To capture your screen on a Razer laptop, you can utilize third-party software options such as Lightshot, Snagit, or Greenshot. These programs offer versatile screenshot features that enable easy capturing and editing of images on your Razer laptop.
Introduction To Third-party Software
Third-party software offers additional features for taking screenshots on your Razer laptop.
Recommended Third-party Tools
| Tool Name | Features |
|---|---|
| Snagit | User-friendly interface, annotation tools, easy sharing options. |
| Lightshot | Customizable shortcuts, basic editing tools, cloud storage integration. |
- Snagit offers an intuitive interface, making it simple to capture and edit screenshots.
- Lightshot allows for easy customization of shortcut keys and quick sharing options.
- Both tools provide essential features for efficient screenshot capturing and editing.
- These recommended third-party options enhance your Razer laptop’s screenshot capabilities.
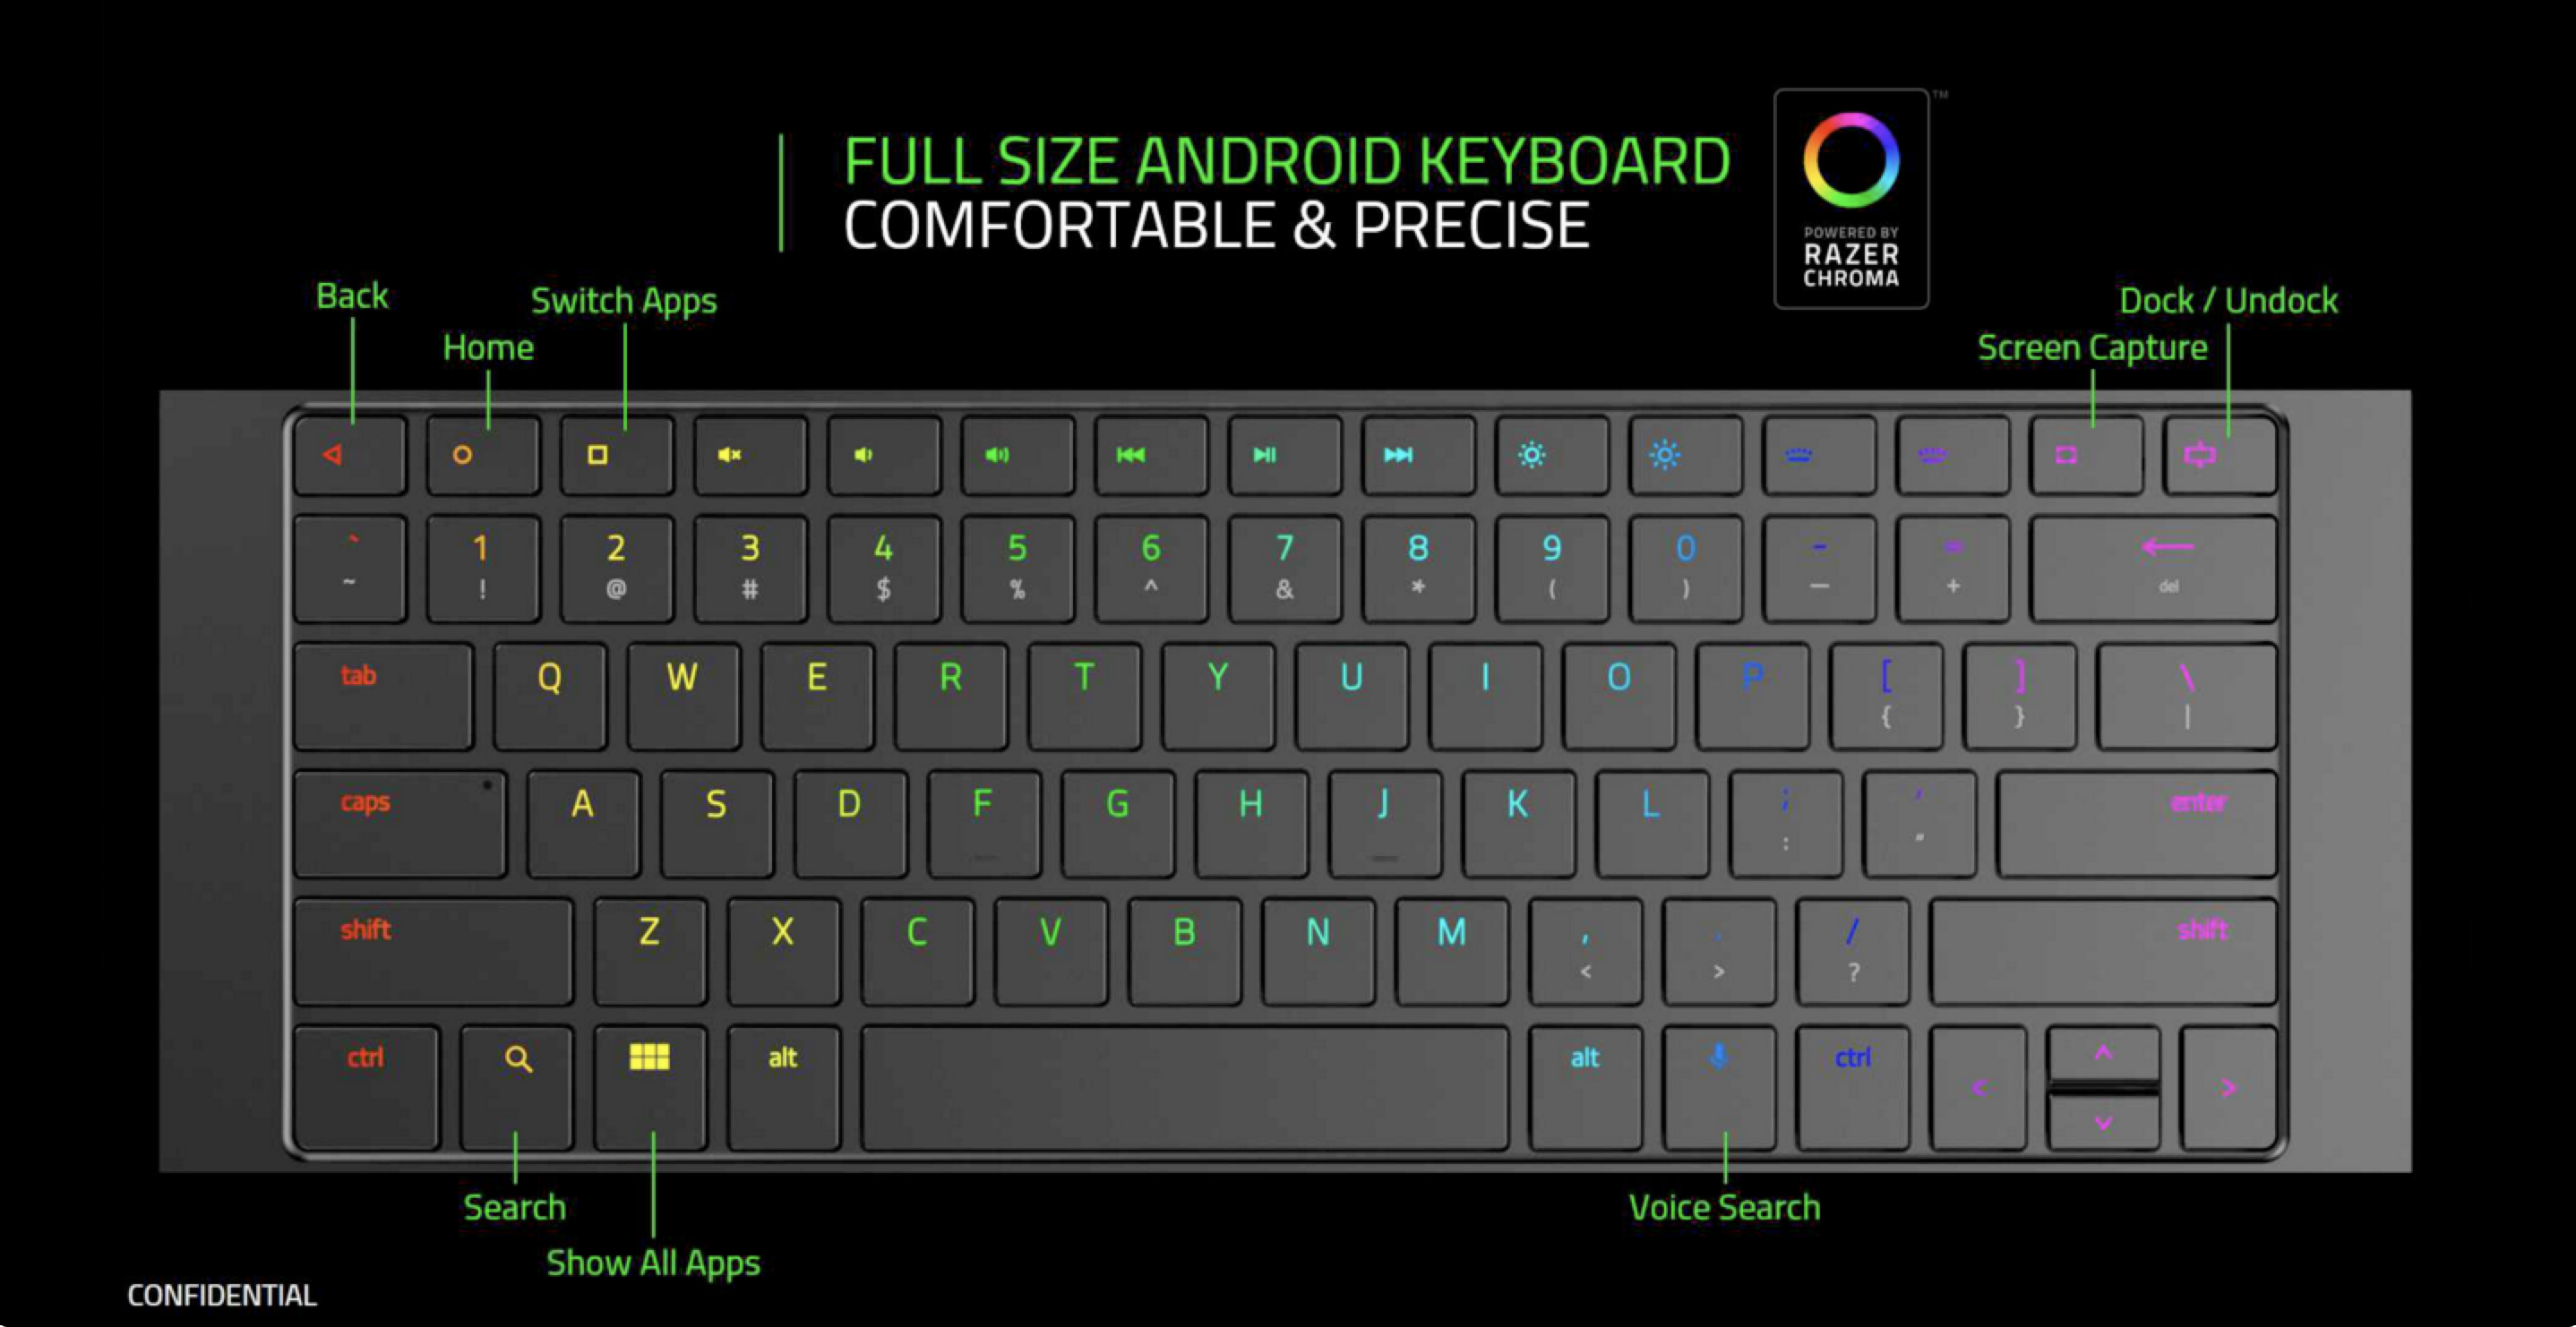
Credit: www.anandtech.com
Troubleshooting
Need to capture your screen on a Razer laptop? Try troubleshooting by pressing the “Windows” and “Print Screen” keys simultaneously to take a screenshot. If the standard method doesn’t work, consider updating your laptop’s drivers or using a third-party software for capturing images.
Common Issues And Solutions
When it comes to taking screenshots on your Razer laptop, you may encounter a few common issues along the way. Fortunately, there are simple solutions to troubleshoot and resolve these problems. Let’s take a look at some of the most encountered issues and their corresponding solutions.
Ensuring Proper Permissions
In some cases, you may find that you do not have the necessary permissions to take a screenshot on your Razer laptop. This can be due to various reasons such as restricted access or settings. To fix this issue, follow these steps:
- Click on the “Start” menu on your Razer laptop.
- Go to “Settings” and click on “Privacy”.
- Select “Screen” from the left-hand menu.
- Make sure the “Allow apps to take screenshots” option is toggled on.
- Exit the settings and try taking a screenshot again.
Common Issues And Solutions
If you’re still experiencing issues after ensuring the proper permissions, there may be other factors at play. Here are a few additional common issues and their solutions to further troubleshoot your screenshotting woes:
| Issue | Solution |
|---|---|
| Screenshot shortcut not working | Check if the screenshot shortcut keys are configured correctly in your Razer laptop settings. Adjust or reassign the shortcut if necessary. |
| Screenshot not saving | Verify that there is enough storage space available on your Razer laptop. Consider clearing up some space or changing the default storage location for screenshots. |
| Screenshot quality is poor | Ensure that your Razer laptop’s screen resolution is set to the desired level. Adjust the resolution if needed to improve the screenshot quality. |
By addressing these common issues and following the provided solutions, you should be able to overcome any screenshotting problems you encounter on your Razer laptop. Remember to double-check your permissions, shortcuts, storage space, and screen resolution to ensure smooth and successful screen captures.
Credit: m.youtube.com
Frequently Asked Questions On How To Screenshot On Razer Laptop
How Do You Screenshot On A Razer?
To screenshot on a Razer device, press the Power and Volume Down buttons simultaneously.
How Do You Capture A Screenshot On A Laptop?
To capture a screenshot on a laptop, press the “Print Screen” or “PrtScn” key on the keyboard. Then, open an image editing software like Paint, press “Ctrl + V” to paste the captured screenshot, and save the image file.
How Do You Screenshot On A Gaming Laptop?
To screenshot on a gaming laptop, press the ‘Print Screen’ button usually found in the top right of the keyboard. Then, open an image editing program, like Paint, and press ‘Ctrl + V’ to paste the screenshot. Finally, save the image to your desired location.
How Do You Screenshot On A Razer 60% Keyboard?
To screenshot on a Razer 60% keyboard, press the “Fn” key and the “Insert” key simultaneously. This will capture the screen and save the screenshot to your device.
Conclusion
In a nutshell, capturing screenshots on your Razer laptop is effortless. By following simple steps, you can easily screenshot anything on your screen. Mastering this skill will enhance your productivity and communication skills. So, don’t hesitate to utilize this handy feature whenever needed!