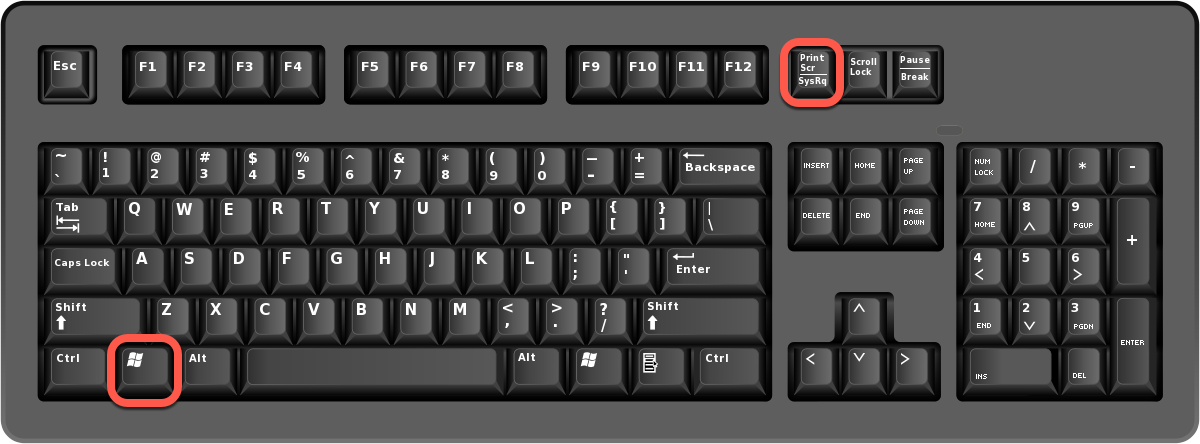
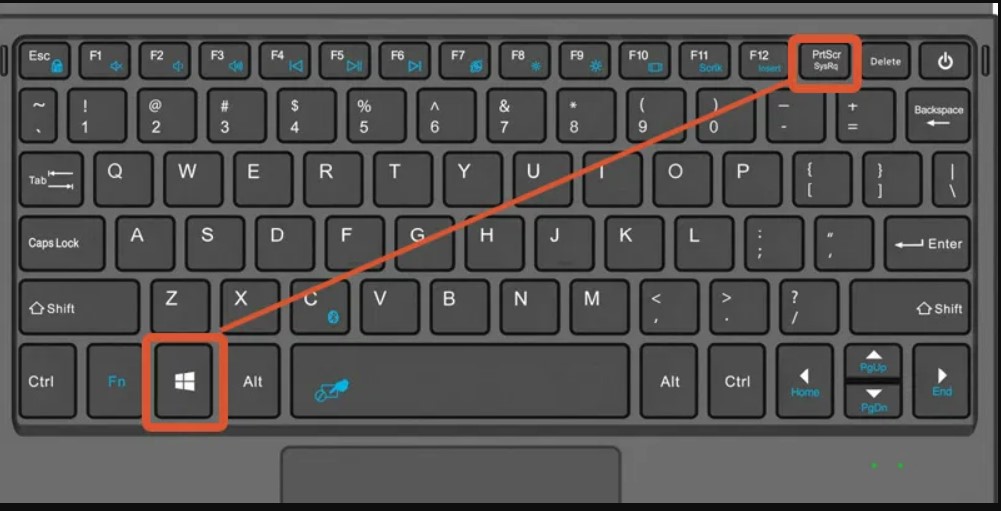
To screenshot on Windows, press the Windows key + PrtScn button simultaneously. Capturing screenshots on Windows is a simple process that can be done with just a combination of keys.
By pressing the Windows key and the PrtScn key at the same time, you can capture the current screen and save it as an image in your computer’s default screenshot folder. This method is available on all versions of Windows and provides a quick and efficient way to capture and save screenshots for later use.
Whether you want to capture a specific window, the entire desktop, or a particular section of the screen, this keyboard shortcut is an essential tool for any Windows user. Remember, if you’re looking to capture screenshots on Windows, simply press the Windows key and the PrtScn button simultaneously.
Credit: www.businessinsider.com
Using The Print Screen Key
When it comes to taking screenshots on Windows, the print screen key can be an incredibly useful tool. Whether you want to capture the entire screen or a specific window, using the print screen key is a quick and efficient way to save and share what’s on your screen.
Taking A Full-screen Screenshot
To take a full-screen screenshot using the print screen key, simply press the Print Screen (sometimes labeled as PrtScn) key on your keyboard. This will capture an image of everything displayed on your screen and save it to the clipboard.
After pressing the Print Screen key, you can then paste the screenshot into an image editing program, such as Microsoft Paint or Adobe Photoshop, by pressing Ctrl + V.
Taking A Screenshot Of A Specific Window
If you only want to capture a specific window that is currently open, you can use the Alt + Print Screen key combination. This will take a screenshot of the active window and save it to the clipboard, allowing you to paste it into an image editing program as previously mentioned.
Credit: www.bitdefender.com
Snipping Tool
The Snipping Tool is a built-in feature on Windows that allows users to capture and save screenshots. It provides a convenient way to capture a specific area of the screen, whether it’s a part of an app, webpage, or any other element visible on your desktop. With the Snipping Tool, you can easily capture and annotate screenshots, making it a useful tool for various tasks.
Overview Of Snipping Tool
The Snipping Tool is a handy utility that comes pre-installed with Windows, starting from Windows Vista. It has remained a popular option for taking screenshots due to its simplicity and ease of use. The tool allows you to capture a screenshot of all or part of your screen and save it as an image.
How To Use Snipping Tool For Screenshots
Using the Snipping Tool to take screenshots is straightforward and can be accomplished in a few simple steps. Here’s a quick guide on how to utilize the Snipping Tool for capturing screenshots:
- Open the Snipping Tool by typing “Snipping Tool” in the Windows search bar and selecting it from the results.
- Once the Snipping Tool is open, click on the “New” button to initiate the screenshot capturing process.
- Drag the cursor to select the area of the screen you want to capture. You can choose from different snip types, including Free-form, Rectangular, Window, or Full-screen snip.
- After selecting the area, the captured screenshot will appear in the Snipping Tool window. You can annotate, save, or share the screenshot directly from the tool.
Snip & Sketch
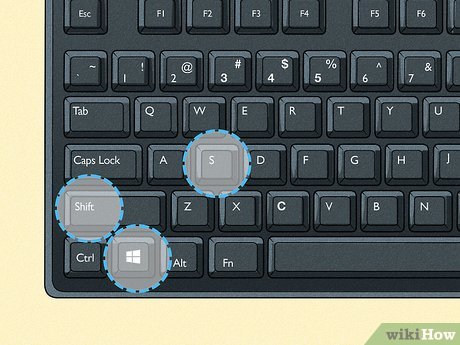
Capture, edit, and share screenshots effortlessly with ‘Snip & Sketch’ on Windows. Simply press ‘Windows key + Shift + S’ to open the snipping tool, then crop, annotate, and save the screenshot directly. It’s a quick and convenient way to capture and customize your screen content.
Introduction To Snip & Sketch
Snip & Sketch is a versatile tool on Windows that allows easy capture and editing of screenshots.
Capturing And Editing Screenshots With Snip & Sketch
With Snip & Sketch, you can capture screenshots of any size or shape, be it a full desktop, a specific window, or a selected area.
After capturing the screenshot, you can annotate, draw, highlight, crop, or even sketch on it directly within the app.

Credit: winsorconsulting.com
Third-party Tools
To take a screenshot on Windows, you can use third-party tools like Snagit, Lightshot, or Greenshot, which offer additional features such as editing and instant sharing. These tools provide user-friendly interfaces and customizable options for capturing and saving screenshots effortlessly.
Popular Third-party Screenshot Tools
While Windows provides built-in screenshot functionality, there are also popular third-party tools available that offer more advanced features and customization options. These tools are specifically designed to enhance your screenshot experience and provide you with additional functionality that may not be available with the default Windows screenshot tool. Let’s take a look at some of the most popular third-party screenshot tools:
Pros And Cons Of Using Third-party Tools
Just like any other software, third-party screenshot tools come with their set of advantages and disadvantages. It’s important to consider both sides before deciding whether to use them or stick to the native Windows screenshot options. Here are the pros and cons to keep in mind:
Pros
1. Advanced Editing Capabilities
Third-party tools often offer a wide range of editing options, such as adding annotations, highlights, blurring sensitive information, and cropping. These features can be extremely useful if you need to enhance your screenshots or provide additional context.
2. Customization Options
Unlike the default Windows screenshot tool, third-party tools allow you to customize various aspects of your screenshots. You can choose the file format, set hotkeys for capturing screenshots, select specific screen areas to capture, and more. This level of flexibility can greatly improve your workflow and save you time.
3. Additional Sharing Options
With third-party tools, you can often directly share your screenshots to various platforms or cloud storage services. This eliminates the need to manually save the screenshot and then upload it separately. It’s a convenient feature that enhances your productivity.
Cons
1. Learning Curve
Third-party screenshot tools may have more features than the native Windows tool, but this comes at a cost – you need to invest time in learning how to use them effectively. While most tools have user-friendly interfaces, it still requires a certain level of familiarity to take full advantage of their capabilities.
2. Compatibility Issues
As with any third-party software, there is always a risk of compatibility issues with your operating system or other applications. It’s essential to ensure that the screenshot tool you choose is compatible with your version of Windows and any other software you regularly use to avoid any potential conflicts.
3. Cost
While there are free third-party screenshot tools available, some may come with a price tag, especially if you require advanced features or want to use the tool for commercial purposes. It’s important to consider your budget and determine if the additional features justify the cost.
Frequently Asked Questions Of How To Screenshot On Windows
How Do You Capture A Screenshot On Windows?
To capture a screenshot on Windows, press the “PrtScn” key. Open an image-editing program like Paint and press “Ctrl + V” to paste the screenshot. Save the image.
How Do You Take Screenshots On A Pc?
To take screenshots on a PC, press the “Print Screen” key on your keyboard. Then, open an image editing program like Paint and press Ctrl + V to paste the screenshot. You can also use the “Windows Key + Print Screen” to save the screenshot directly to your Pictures folder.
How Do I Screenshot On Windows With A Keyboard?
To screenshot on Windows using a keyboard, press the “Print Screen” or “PrtScn” button. The screenshot will be saved to the clipboard. You can then paste it into an image editor or document by pressing “Ctrl” + “V” or right-clicking and selecting “Paste.
“
What Are The 3 Ways To Take A Screenshot?
You can take a screenshot by pressing “Print Screen” key on keyboard, using snipping tool in Windows, or pressing command-shift-4 on Mac.
Conclusion
Capturing your screen on Windows is simple with these easy-to-follow tips. Whether for work or personal use, mastering the art of screenshotting can boost your productivity. Remember to practice and explore different methods to find what works best for you.
Elevate your Windows skills starting today!